
Want to make your website stand out without touching a single line of code? You’re in the right place.
In this guide, you’ll learn how to customize the GeneratePress header the easy way. Whether you’re building your first WordPress site or want a clean, fast layout, this tutorial is beginner-friendly and doesn’t require any coding. Using GeneratePress + GenerateBlocks, you can customize your site header in just a few clicks.
What Is GeneratePress Header Customization and Why Does It Matter
The header is the top section of your website — usually containing your logo, navigation menu, and sometimes a call-to-action or search bar.
In GeneratePress, the header is lightweight, responsive, and super flexible. Customizing it properly will improve user experience, boost trust, and reinforce your brand.
What You Need Before We Start
- WordPress site installed and running
- GeneratePress theme activated (free or premium)
- GeneratePress Premium for advanced features
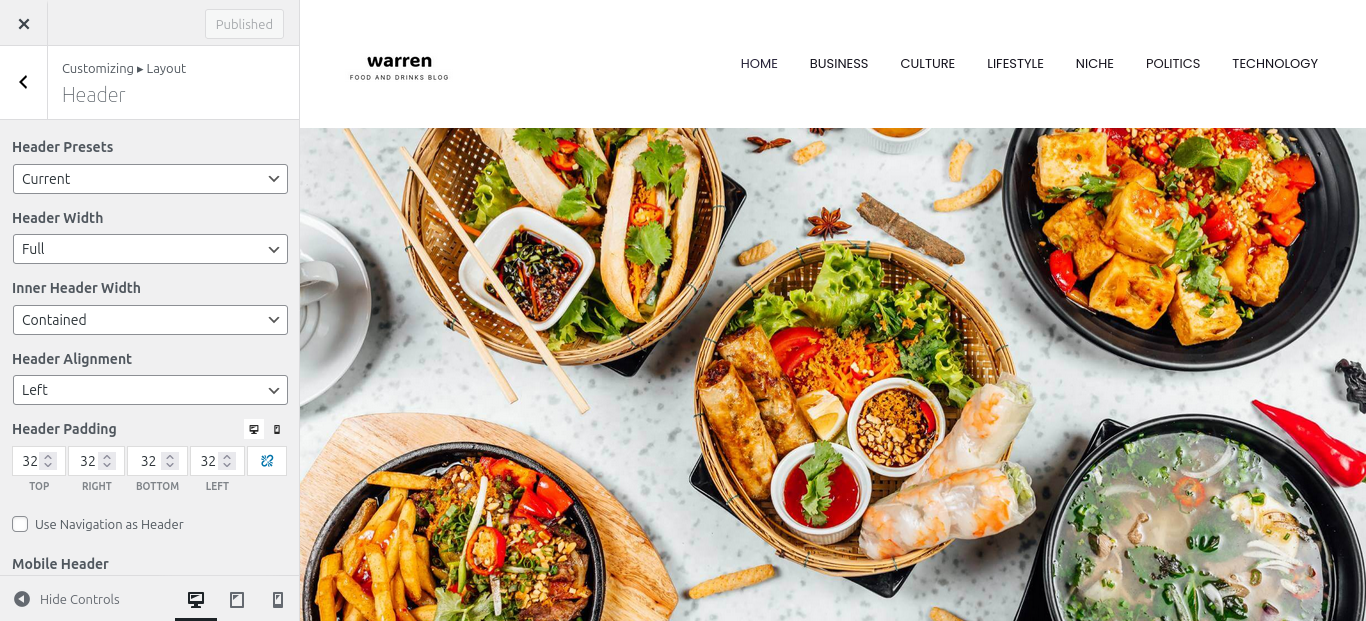
How to Access GeneratePress Header Customization Settings
Start by going to your WordPress Dashboard:
➡ Appearance > Customize > Layout > Header
Here you’ll find all the tools to manage header width, alignment, padding, and more.
Customize Header Layout
1. Header Width & Inner Width
- Full Width: Header stretches edge to edge — great for modern designs.
- Contained: Keeps content aligned with the body — better for minimal sites.
2. Header Alignment
Choose how you want the content inside your header to align:
- Left
- Center
- Right
3. Padding and Spacing
Use sliders or manual input to adjust:
- Top & bottom padding
- Left & right spacing
This is essential for making your header look clean and balanced.
4. Sticky Header (Premium Feature)
Want the menu to stay visible while users scroll?
➡ Go to Customize > Layout > Sticky Navigation
Enable “Sticky Navigation” and tweak its style for mobile and desktop.
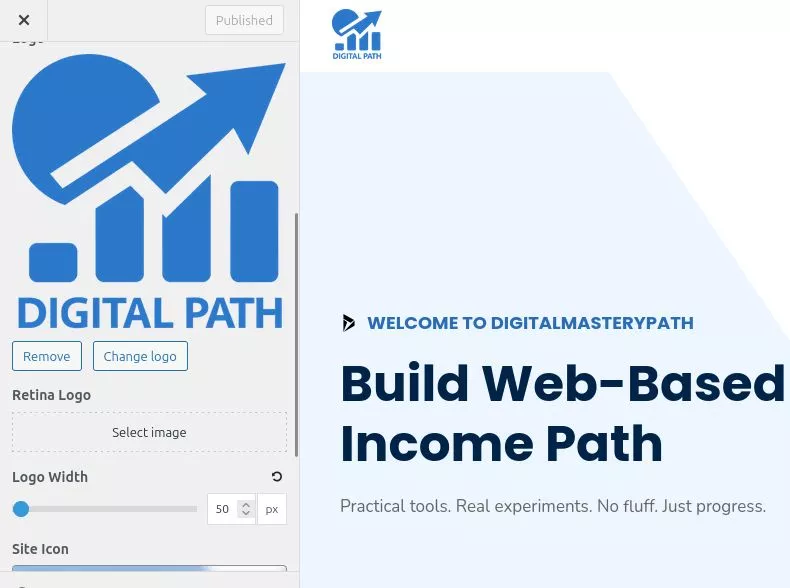
5. Adding a Logo & Site Identity
Navigate to:
➡ Customize > Site Identity
Upload Your Logo
- File format: PNG or SVG for best results
Site Title & Tagline
- Show or hide based on your design choice
- You can adjust typography (size, font, spacing) under Customize > Typography
Creating and Styling Your Navigation Menu
Step 1: Create the Menu
Go to:
➡ Appearance > Menus
- Create a new menu
- Add your pages
- Assign it to the “Primary Menu” location
Step 2: Set Menu Position
Back in the Customizer:
➡ Layout > Primary Navigation
You can place the navigation:
- Below Header
- Above Header
- Inside Header
Step 3: Style the Menu
Go to:
➡ Customize > Colors > Primary Navigation
Here you can set:
- Background color
- Text color (normal, hover, active)
- Mobile menu color
For font size and spacing:
➡ Customize > Typography > Primary Navigation
Advanced Header Customization with GeneratePress Premium
With GP Premium, you unlock Element Hooks and Block Elements to build dynamic headers.
1. Create a Custom Header Element
Go to:
➡ Appearance > Elements > Add New > Header
Choose:
- Display Rules (e.g., show only on homepage or blog)
- Merge with content (optional for full-width headers)
Design using GenerateBlocks directly inside the header area!
This feature is very useful. So, we created a plugin called Custom Elements for GeneratePress by DigitalMasteryPath to support the free version
2. Mobile Header Customization
Responsive design is critical.
➡ Customize > Layout > Mobile Header
You can:
- Show/hide logo
- Adjust menu icon type
- Set breakpoints for mobile display
Optional Tools to Help You Out
- 🎨 Canva – Design or resize your logo
- 🧱 GenerateBlocks – Build advanced header layouts visually
- 🧩 GP Premium – Unlock sticky header, mobile tweaks, dynamic layouts
Final Tips for Beginners
- ✅ Keep it simple: Don’t overload your header with too much info
- 📱 Test mobile layout: Always check on multiple devices
- 👀 Preview before publishing: Use live preview to avoid surprises
- ⚡ Performance tip: Stick to GeneratePress + GenerateBlocks for the fastest results
Related Posts for You
- 👉 GeneratePress Tutorial for Beginners
- ⚖️ GeneratePress vs Astra: Which WordPress Theme Should You Use in 2025?
- 🚀 Why GeneratePress Is the Fastest WordPress Theme (Tested in 2025)
- 🎨 Create a Beautiful Landing Page with GenerateBlocks – Step-by-Step Guide
- 🧠 Master GeneratePress Block Elements to Build Custom Layouts Fast
If you found this tutorial helpful, feel free to share it, and subscribe for more no-code WordPress tricks using GeneratePress + GenerateBlocks.